Another week. Vanilla Essence, Home brewing, seed saving etc

This has been such a busy week here! The garden is running a muck (read, weeds out of control) and I have been working way more than we were expecting me to due to short staffing. Roger has been busy elsewhere during the weekends and we are behind in everything. But… all is good 🙂

We got a great buy!! I must say here when my hubby bid on it on an auction site I thought he was buying a Still and encouraged him, alas it is a beer making kit which is NOT QUITE THE SAME. Beer isn’t cheap and though I can see the sense in making one’s own….I hate the stuff. I was thinking vodka for fruit liquers and preserving herbs (yummy things), he was thinking ice cold beers at the end of a working day …. every Kiwi male enjoys his beer. But I did get something out of it. This all came for $53 and note the glass bottles, 1 dozen of those gorgeous things which we will not be using for beer 🙂 This unit had been used once.Image

I mentioned last week a friend had made us some vodka so I have been trying different things with it. He has told us we can borrow his Still to make our own, if you have Vodka you can make all sorts and homemade vodka is soooo cheap – $28 for 8 large bottles!

Vanilla Essence:

Split 6 vanilla pods sideways then cut in half. Place in bottle and pour over 1 cup vodka. Leave to stand in a dark cupboard for 8 weeks to mature. Apparently this will last forever, just topping up vodka or adding another pod as required. It smells divine!

Vanilla Essence

Vanilla Essence

After 3 days:

IMG_3252

Herbal Tinctures:

Instructions from my sister-in-law Beth – Place 300 g of desired herb in airtight jar and cover with vodka. Leave to sit in a cool dark place to 2 weeks, shaking regularly. Squeeze all liquid out of the leaves and discard, strain and bottle. Take 1 – 3 tsp a day. I want to build up a supply of these but my first is Feverfew, used for migraines and as an anti-inflammatory.

IMG_3237

Freezing without blanching: A tip.

I do all my beans, zucchini and pumpkin this way (if pumpkin is not storing well I will freeze it). It’s the quickest method I have found and removes all the air without need for a vacuum pump. The snaplock bags can be used dozens of times.

Place vegetables in bag filling about 3/4 full.Image

Without sealing shake all vegetables down, fold over to meet vegetables while letting air escape.Image

Seal while folded. All excess air is gone.

IMG_3232

Press out flat for storage

Image

Coriander Seed:

Whose idea was it to dry and collect this? Oh yeah…. mine. Alot more complicated than it sounded at the time because we never pulled it out and hung it upside down in a rubbish bag when we should’ve. By the time we pulled it they had been dropping for weeks so instead we did it the hard way!

One coriander plant = thousands of seeds

Image

Just a little of them.

Image

McGyver’s (Mr QAL’s) solution for separating seed from stalk 🙂 🙂

Image

1 bowl full, as far as we have – and this AFTER Syd chased the cat through the lounge and spread a complete bowl all over the carpet. Back to the flippin heater / fan stage of collection, instead I threw my hands in the air yelling “That’s it, I’ve had it!” so it might sit there a few days before the final product is clean and edible!

Image

Chocolate and Almond Buckwheat Granola Clusters:

A few months ago I changed to a gluten free diet, this past few weeks I have been craving a decent cereal to replace homemade muesli. Fran from Serendipity Farm saved the day with a wonderful recipe for these granola clusters which she has tweaked from another recipe. http://theroadtoserendipity.wordpress.com/2014/01/29/narf7s-bolshie-blissful-buckwheat-granola-clusters/

I then tweaked hers and came up with this which I will post in a wee while but Oh yum, it’s delicious and not nearly as expensive as similar products on the market, in fact it turned out far cheaper than I thought it would.Image

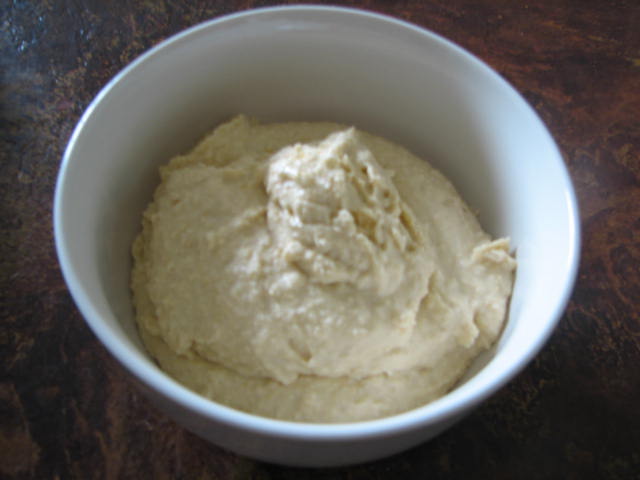
First you need Sunflower Butter and I have been wanting to try some of this so a good excuse. Also an economical butter to make and tastes delicious. The recipe for this can also be found on Fran’s post or http://www.gypsyforest.com/welcome_to_gypsy_forest/2012/09/cinnamon-maple-sunflower-seed-butter.html

I used honey rather than maple syrup.

IMG_3248

Coconut Oil Deodorant:

This is all I use nowadays and is very economical to make compared with organic deodorants. I shall also post this this separately.Image

It’s a beautiful day here today and I have so much to do I don’t know where to start but at the beginning is probably a good idea….coffee, while I think about everything and procastinate as well as only I can do 🙂

Oh, I did have a nice thing happen. I got an email from a fellow blogger from Australia who is coming to NZ and would like to visit if he can manage it. I think that’s pretty cool 🙂

And this week I started reading on the e-course I won on Everyday Simplicity from http://handcraftedtravellers.com. Check out their site if you haven’t already, it’s just lovely.

Garlic Hummus

Hummus is so simple to make and is cheap to do. A wee pot of it here costs around $3 – $4 but a batch of around 1 1/2 cups can be made for less than $1.50. I also prefer the taste to commercial hummus.

Image

I use chickpeas that have been cooked and frozen in bags. Instead of Tahini I use sesame seeds that have been ground in an old electric coffee grinder.

11/2 cups chickpeas

3 tabslespoons sesame seeds, ground

3 cloves garlic

1/2 tsp salt

4 tbspn lemon juice

1/4 – 1/3 cup olive oil

Throw all in a kitchen whiz and process until smooth, adding as much olive oil as is needed for a smooth, creamy texture. To serve drizzle with a little extra olive oil.

This basic recipe can be used with heaps of other options. Roasted garlic is nice in it rather than fresh but I don’t find it worth the hassle of doing it especially. Roasted pumpkin or sweet potato can be added (with garlic omitted) as can sundried tomatoes, roasted capsicum.

I would’ve shown it in a nicer dish surrounded in nice fresh vegetables from the garden but we had visitors and no time to take a photo so apologies for the less than exciting photo of it 🙂

Almond, Quinoa and Pumpkin Seed Bread

A couple of weeks ago I posted a recipe for non wheat bread using oats and psyllium husk. https://quarteracrelifestyle.wordpress.com/2013/10/26/nut-and-seed-bread-flourless/

I wanted to try making one using quinoa and googled to see if anyone had already tried this…and yes, they had! This uses quinoa flakes, almonds (ground), pumpkin seeds, flax seeds etc.

Image

For the full recipe please see here http://deliciouslyella.com/almond-quinoa-pumpkin-seed-bread/

I have to be honest and say that though this is nice I found the taste of pumpkin seeds too overpowering for me personally, there is 1 1/2 cups of them in this loaf, most of them processed to a flour. But, that is just me and this recipe is one that could be adapted to taste. I also used the pulped and dried almonds leftover from milk and just a little less water. Though not as economical to make as the oat one this is a good bread that is lovely toasted.

Roasted Asparagus and Pesto Pasta

Image

This is a simple and very delicious meal to make. I used rice pasta, homemade pesto, homemade sundried tomatoes and homegrown asparagus. The pesto I used was my parsley and sunflower seed – the sunflower seeds make it an economical pesto (I sometimes use walnuts instead) The recipe for this is here, I make up batches and freeze in ice cube trays for use in recipes.https://quarteracrelifestyle.wordpress.com/2013/02/22/parsley-sunflower-pesto/ Despite the rather humble ingredients this is a really tasty pesto.

The quantities for this dish are approximate,  really it’s just a throw together meal depending on quantities available or required.

1 1/2 bunches asparagus (12 – 15 spears?)

Around 3 – 4  cups cooked pasta

1/2 – 3/4 cup pesto

Sundried tomatoes to taste, sliced finely

Preheat the oven to 350 deg. Put the pasta on to cook in boiling, salted water.

Pour a little olive oil into an ovenproof dish. Break asparagus into 3 pieces and roll in oil in dish. Roast in oven 12 minutes turning once.

Drain the pasta and toss the sundried tomatoes and pesto through it. Add the asparagus and fold through gently. Tip into bowl and decorate with a few more slices of sundried tomato.

This recipe originally came from Damn Delicious and she adds mozzarella to it http://damndelicious.net/2012/07/21/pesto-pasta-with-sun-dried-tomatoes-and-roasted/

For dessert we had a vegan avocado/chocolate tart topped with fresh strawberries. I have made this a few times since I found this divine recipe here http://glutenfreegus.com/2012/12/28/387/

Quinoa Chocolate and Coconut Balls….2 ways

Image

Since going gluten free I have been baking for my husband but looking for other recipes to satisfy MY sweet tooth. There are many versions of these on the net, I looked at alot of them them then threw my own concoction together testing the flavours until I was happy with it. These are “cakey” in consistency but light, chocolaty but not too sweet or rich and they are yummy. This recipe made about 18 quite large balls, it could easily be halved.

2 cups cooked quinoa

1 cup dates

1/2 cup walnuts (or sunflower seeds)

2 tablespoons peanut butter

1 tablespoon honey

2 tablespoons cocoa

3 tablespoons coconut oil

1 tsp vanilla

1 – 1 1/2 cups (approx) coconut

extra coconut for rolling

Put the dates and walnuts in a food processor and process till crumbly. Melt the coconut oil. Add all ingredients to dates and walnuts, starting with the one cup of coconut. Process till a consistency of dough that can be formed into balls, adding extra coconut if mixture too soft. Roll in coconut and chill.

Chocolate Cranberry Quinoa Balls

The second time I made these I changed the recipe a little. I used 1 cup of quinoa, omitted the peanut butter, increased the coconut to 2 cups, added 1 cup of cranberries.

IMG_3220

I chilled these then dipped in melted dark chocolate combined with 2 tsp coconut oil. Chill and keep refrigerated. These were wonderful too.

IMG_3223

Chocolate Brownie….a healthier version

Image

This is nice, rich and has a nice texture, but it’s not as sweet or chewy as traditional brownies. I think next time I would use butter as the original recipe suggested, instead of coconut oil (I have had some sitting in the fridge for ages that needed using but won’t be buying any more) just for a bit more buttery texture. And I’ll put chocolate bits in….I thought about it lol. The original recipe is at http://www.beyondthepeel.net/2013/06/unbelievable-chocolate-coconut-brownies.html I replaced the sugar with date sugar and used walnuts instead of coconut.

1/2 cup coconut oil or butter

1/3 cup cocoa

6 eggs

1 tsp vanilla

1 cup date sugar

1/3 cup honey

1/2 cup coconut flour

pinch salt

3/4 cup walnuts

Line an 8″ square tin and preheat oven to 325 deg. Melt coconut oil. Whisk the wet ingredients together till well blended. Mix the flour, cocoa and walnuts together then pour over wet ingredients and mix well to combine. Spread into greased tin and bake around 20 minutes or till cooked but still soft.

Cool for 5 minutes and sprinkle with icing sugar. Slice into squares.