Golden Yogini Milk

I love Chai Lattes, there is a place I go once a week for the best ever Spicy Chai Latte and I had decided to try making them for myself. I have been experimenting with recipes online but none of them come close to it for flavour.

When I saw this recipe I thought I would try because of the turmeric, it’s very good for the pain of fibromyalgia. Apparently this drink is great for a peaceful sleep but I have been having it mid-morning. I added ginger and a small amount of honey and THIS is well and truly as good as satisfying as my special chai lattes.

Turmeric is a great anti-inflammatory, it also is good for lifting spirits and calming anxiety. Don’t let the turmeric put you off trying this, it doesn’t taste at all like curry in this drink 🙂 I altered the recipe a little the second time around to make a bit spicier….to suit my tastes. I also raised the amount of coconut oil in this as I have been trying to incorporate more in my diet in small ways.

The original recipe comes from Katie Silcox and she calls this her Guardian Angel Medicine. She also discusses the merits of drinking this, Ayurvedic medicine and plant allies. Check out her lovely blog, her post and comments on this soothing, very moreish hot drink. I would probably suggest making her version first and seeing if this is spicy enough for you.

Any option to dairy milk will work with this.

Golden Yogini Milk:

1 tsp coconut oil

1 1/2 tsp turmeric

1/3 tsp ground cardamom

1/3 tsp cinnamon

1/3 tsp ground ginger

pinch nutmeg

1 cup milk

1/2 tsp honey (optional, to taste)

Melt the oil gently in a pan. Once melted add the spices and stir through. Once you can smell the spices add the milk and stir well. Bring to the boil. Remove from heat and pour into a blender. Blend for 20 seconds. NOTE: You will not want to leave the vent covered because of the steam (I had a nasty burn years ago from doing this) Cover loosely with a cloth instead. The resulting drink is rich, frothy and deliciously fragrant and spicy.

IMG_3437

Turmeric and Coconut oil Toothpaste

Ok… after talking about it I made some and I like it 🙂 Coconut oil has anti-bacterial qualities and there are many recipes around for the paste which also uses baking soda. I posted a couple of days ago on using Turmeric as a tooth whitener/polisher (which is very effective) and someone suggested I try it in the toothpaste.

3 good tablespoons coconut oil, softened

2 tsp baking soda

1 tsp tumeric

Whisk all together well until thick, well combined and creamy. Store in sterile jar. Use on a dry toothbrush and brush gently for a minute over a basin of water (It’s messy)

Image

This doesn’t taste bad. It has a mild flavour, the turmeric takes the edge off the baking soda but is not over powering. Apologies for the poor picture quality (will replace at some stage!)

Image

Green Omelette with Avocado Salsa

I found this recipe in Dr Libby Weavers book Real Food Chef, The Power of Plants.

The omelette is full of baby spinach, parsley and peas and topped with avocado, tomato, red onion and seeds. I could eat this every night, it’s truly very good and takes only minutes to make really. I especially like that we grow all this ourselves with the exception of the avocado and seeds.

Image

Recipe is for one serving.

Omelette:

3 eggs

2 cups baby spinach leaves

1/4 cup fresh parsley

1/2 cup cooked peas

1/3 cup milk (I used nut milk)

Salt and pepper to taste.

Heat some oil, butter or coconut oil (your preference) in a non stick pan. Whisk the eggs, milk and seasonings, add the peas and parsley. The recipe suggests steaming the spinach tilled wilted but I just put it in the pan to wilt before pouring the eggs over it. While this is cooking make the salsa.

Avocado Salsa:

1 tomato, chopped or several cherry tomatoes halved

1 avocado, chopped

red or green onion to taste

chopped coriander (cilantro) optional

salt and pepper

Seeds of choice eg, sesame, pumpkin, sunflower

Mix together the tomatoes, coriander, onion and seasonings. Gently combine with avocado.

Once the omelette is cooked remove from pan to plate. Top with salsa and sprinkle desired seeds over (I used pumpkin and sesame)

Enjoy.

Uncle Howard’s Chocolate Ganache Tart: The Best Vegan (and healthiest) Dessert You Will Ever Eat

I made this (very un)sinfully delicious tart yesterday. For a taste of something decadent without the horror ingredients I’d urge anyone to try this 🙂 Made with walnuts, avaocado, coconut oil, cocoa, dates and I used honey as a sweetener – topped with a wee bit of cream it’s perfect.

Gluten Free Gus

photo

Okay, gave you Chocolate Mousse with ginger crust, a dessert with traditional ingredients.  You’ll have fun trying this whether you eat a vegan diet or not. British brother-in-law Howard (check out his music: http://www.youtube.com/watch?v=uKO24MPVF7c) made it for us last summer, twice in fact, because it was so popular!  Trust me, it is rich and delicious enough to become a favorite.  Last night I texted the recipe to son Nathaniel who reported it was “insanely good.” I smiled when I checked the text to write this: my iPhone had autocorrected one of the ingredients: 1 Tablespoon vanilla “extravehicular.”  And so:

Vegan Chocolate Tart

7-9” tart pan with a removable bottom, lined with a circle of parchment paper.  The width of the pan will determine the thickness of the tart.  Straight sides work better than fluted.

Click Here To Print Recipe

INGREDIENTS

Crust:

8 oz. pecans, walnuts or almonds

6 oz…

View original post 514 more words

Thoughts At The Supermarket

This original article linked through this worthy post is so worth a look. It’s just crazy – non-food food.

Awesome Åshild

I was going to share some of my day with you from yesterday today, but I came across this article on my morning browse over a cup of coffee (iced of course, when in Greece..) and decided this is so much more important.

I have thought these thoughts so many times when going to the local supermarket on Sundays for my weekly shop. The 2 litre bottles of soft drinks and the half a kilo chocolate bars are being pumped on the end of the isles, with promises of happiness, consert tickets, winnning a trip to paradise and meeting your footy hero. And at the checkout you will find even more sugar PLUS (and this is the big plus) all the magazines you need to deal with it all. I have described my love for magazines to you earlier, and this is no better. All the magazines you can…

View original post 212 more words

Homemade Date Sugar

I have not been able to buy this in our area, let alone price it – this worked out very cheap to make. I got the directions from here http://butterbeliever.com/how-to-make-your-own-date-sugar, she used medjool dates but I used packaged dried dates purchased on special at $1.60 for 400 g. One packet gives you one large preserving jar full.

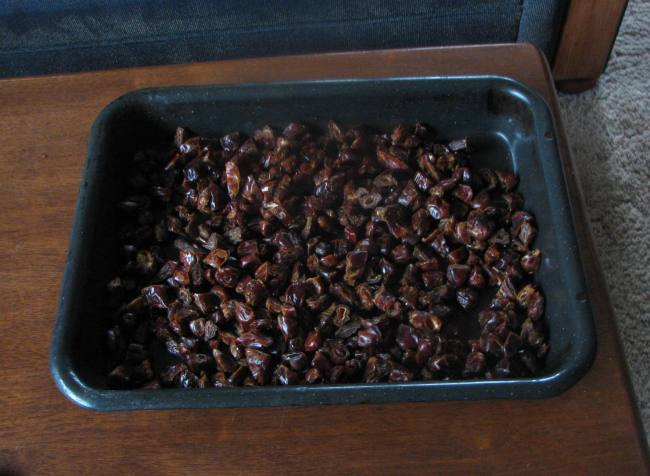
I dried the dates for 4 hours on 125 deg f, turning often. These were very soft and sticky and I didn’t think it was working so turned off the oven and left them overnight to find rock hard dates this morning.

Image

The person in the link above cooked them quicker on a higher temperature but I didn’t want to risk burning (I tend to forget things in the oven!)

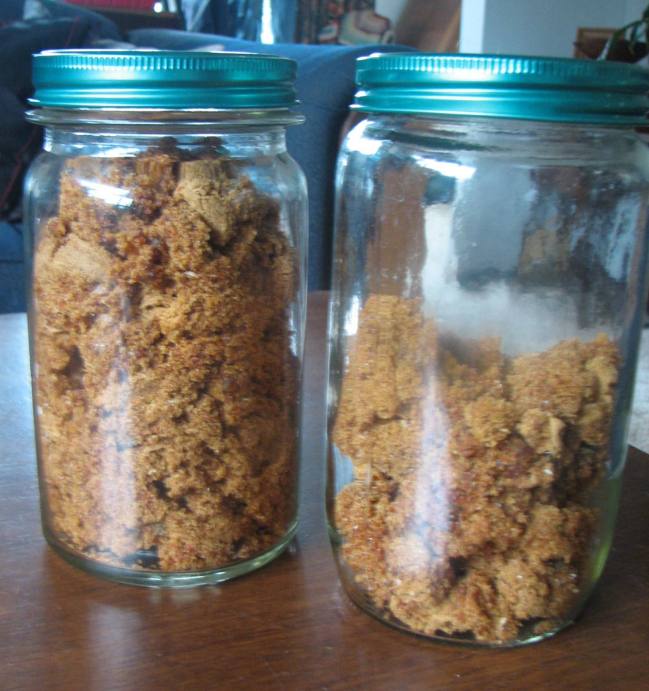
The dates were then ground in the coffee grinder, they can be done in the food processor but I didn’t think my old one would handle them. The sugar produced is sticky and clumpy – I am thinking when brown sugar goes hard a way to soften it back is to put in a piece of apple and I am going to try this just out of interest to see if it makes any difference to the texture of it (added a week later, this did NOT work, but putting in a microwave or basin of warm water before use does.  It will still be fine for baking etc, very nice on porridge, similar to brown sugar, I am really pleased with it.

Image

Growing your own groceries – our meals

It’s hard times out there for many and people are really struggling to cover just their basic needs. My blog (even though it hasn’t been going long) has been about our need to grow our own food….if there was one big thing we could do to make things better for ourselves it was this. We put in a smallish vege garden the first summer that just grew every year and last spring we gave ourselves the challenge of attempting to grow enough to feed the two of us for a year and, do it well. We enjoy our food and are reasonably health conscious.

I just want to show in photos a sample of what our meals have been like this year, mostly from the garden….and grown as cheaply as possible. I truly believe this is an achievable option for people who may be going through hard times.


This is typical of our diet. We also grow heaps to share and have a small community of friends who use part of the garden in summer. We grow anywhere and everywhere and as many varieties as we can manage, this grows every year.

This doesn’t cover preserving, herbal teas etc which I will show in my next.

We do it on a bigger scale that many can do but plants can be grown in containers, tyres, fruit juice bottles…anywhere in anything.  These meals are cheap, some nearly free and healthy. Gardening is alot of fun, it’s rewarding, it’s addictive (clearly) and most of it is done by my husband ….who never, ever saw himself as a person that would ever garden.

I am preaching to the converted for many who will read this, but for others who dream and desire, give it a go! The world is full of people growing food in many different spaces in many different ways.


Homemade Toasted Muesli (with figs, walnuts and feijoa)

Image

Rolled oats are the cheapest cereal we can buy, coconut is cheap and with whatever dried fruit is in the pantry muesli can be made quite a bit cheaper than is purchased from the supermarket. I used dried apple, feijoa and figs I have done myself with the addition of a handful of dates chopped finely. The walnuts were grown locally and purchased for a very good price, the only things worth any expense were pumpkin and sunflower seeds, which are optional.

7 cups of rolled oats

1 cup of coconut

Mix these both together in a roasting dish and melt together 4 tablespoons oil (I used rice bran) and 1 heaped tablespoon of honey (this makes just a slightly sweetened version). Place in a preheated oven at 175 deg and bake for around 20 minutes, stirring often. Bake only till golden brown taking care to mix well each stir so as not to scorch. Note that this will continue to brown a little once removed from the oven.

Add whatever dried fruit, nuts and seeds (long thread coconut is nice added here too) you like to this basic mix and leave to cool before storing. If the dried fruit is added before cooking they will turn as hard as stones…! Dried apricots and slivered almonds used to be a favourite but now I just stick to what I can grow myself.

Image

Calendula and Lemon Balm Salve

I found this recipe on Ecocrazymum.com last year and have only just managed to find some beeswax locally. My husband suffers from eczema so I have been wanting him to try it rather than prescribed creams, and it would appear to be a handy salve to have on hand. The list of ailments it is supposed to help is long:

  • Diaper Rash
  • Cuts & Scrapes
  • Minor Burns
  • Bug Bites & Stings
  • Psoriasis
  • Topical Thrush
  • Inflammation
  • Itching
  • Eczema
  • Chapped Lips
  • Cold Sores
  • Dry Skin
  • Athletes Foot
  • Warts
  • Cracked Heals
  • Sunburn
  • Stretchmarks
  • Hemorrhoids
  • Shingles
  • Muscle Aches & Menstrual Cramps
  • And so much more!

Ingredients:

  • 2 Cups Olive Oil
  • 3/4 Cup Dried Lemon Balm & Calendula (Just throw in a couple handfuls of each until you get 3/4 cup- try to use equal parts of each.)
  • 1/2 Cup Beeswax
  • 3 TBSP. Coconut Oil
  • 2 TBSP. Shea Butter
  • 5 Drops Tea Tree Oil
  • 5 Drops Lavender Essential Oil
*I do not add preservatives. Many of the ingredients contain natural preservatives, so your salve will have a shelf life of 1-2 years.
Directions:
  1. Add dried herbs, olive and coconut oil into crock pot and heat on low for 3-4 hours.
  2. Strain oil through cheesecloth and return to (clean) crock pot on low heat.
  3. Microwave beeswax and shea butter in 1 minute increments until fully melted.
  4. Immediately add melted beeswax and shea butter into crock pot & mix well with wooden spoon. If the wax starts to harden up turn the crock pot up to the high heat setting and stir until completely liquified.
  5. Add in tea tree and lavender essential oils and mix well.
  6. Pour mixture into small containers with lids and keep lids off until salve becomes solid.

This made over 3 cups of salve. I didn’t have shea butter so excluded this. I managed to pick up little blocks of 50g beeswax for 50 cents each from a local apiary which I was really pleased with. I also altered the method – simmering the oils and herbs for 2 hours over low heat in a double boiler, straining then adding the beeswax and returning to heat, adding essentials oils when finished. I will add to this at a later date to say how we have found it

.IMG_2172